Accelerating Video Playback with After Effects
In the domain of video enhancement, altering a clip’s speed can have a significant effect on its narrative impact. Whether you’re aiming to devise an adrenaline-fueled action sequence or condense an extended scene, Adobe After Effects offers an array of tools and features to assist you in achieving your objective.
Deciphering Time Remapping
Time Remapping is an integral video editing concept enabling control over playback speed, independent of the overall composition time. This permits precise regulation of speed changes, thereby creating varied visual effects and enhancing the narrative.
In Adobe After Effects, temporal variations are achieved by inserting keyframes at varying points within a video’s timeline. Each keyframe signifies a specific playback time and speed. By shifting these keyframes, you control speed variations over time, resulting in smooth transitions or sudden pace changes.
One of the merits of time remapping lies in its flexibility for adjusting specific segments. You can apply diverse speed variations to different parts of the composition, facilitating creative narrative techniques. For instance, an essential moment can be slowed down to highlight details, followed by a swift pace increase for an exciting action sequence.
Moreover, time remapping in After Effects offers time interpolation options such as linear, bezier, and keyframe hold. These interpolation techniques manage the pace change between keyframes, impacting the smoothness or sharpness of transitions. Experimenting with different interpolation settings can impart unique dynamics to your videos.
How can you accelerate in After Effects?
Method 1: Using the Speed/Duration Option
The Speed/Duration option is one of the most straightforward methods to accelerate video in After Effects. It allows for swift adjustment of video playback speed without resorting to time-consuming keyframing.
Here’s a guide to using the Speed/Duration option:
- Begin by importing the desired video into your After Effects project. This can be accomplished by choosing “File” from the menu and opting for “Import” to locate and import the video file;
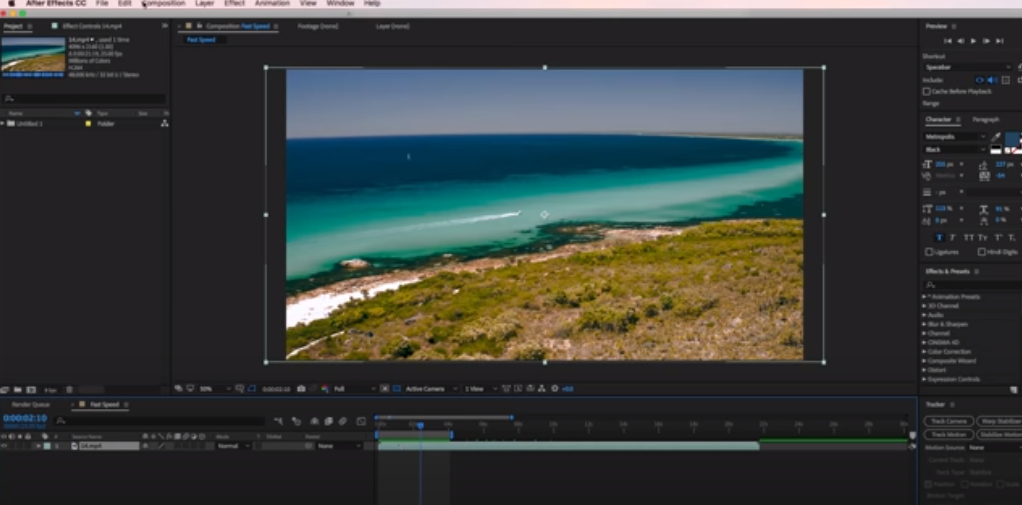
- Create a composition by right-clicking the video in the project pane, navigating to “New Composition from Selection” and clicking it. This action will form a new composition matching the video’s parameters.

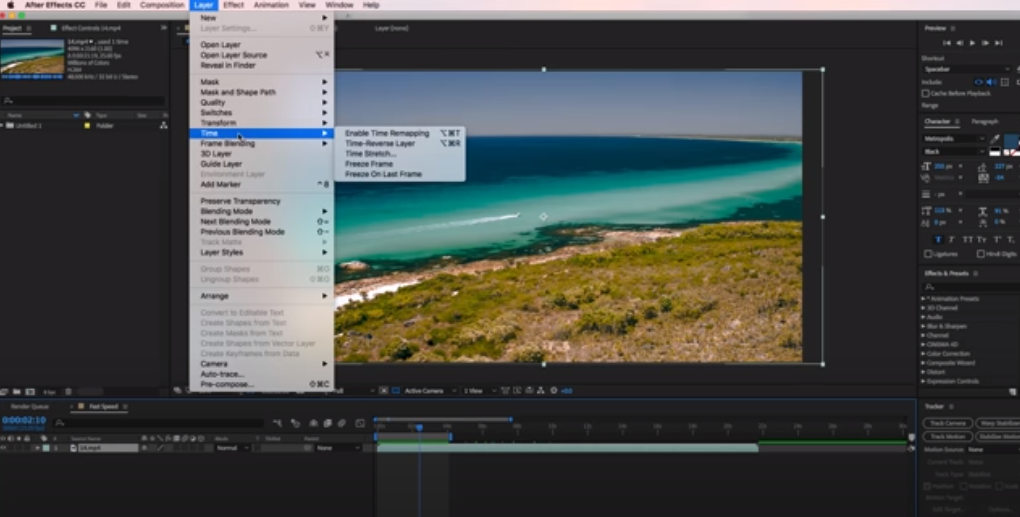
- Access the Speed/Duration setting by selecting the video layer in the Composition panel and right-clicking it. From the context menu, navigate to “Time” and choose “Time Stretch”;

- In the “Time Stretch” dialog box, you’ll find the “Stretch factor” option. Boost the Stretch Factor value to accelerate the video. For instance, setting the stretch factor to 200% will result in video playback at double the speed;
- Click the OK button to apply the speed setting. You can now preview the video in the composition panel or use the playback controls to view the accelerated playback;
- Upon accelerating your video, you might notice a change in the clip’s duration. If you desire a specific duration, you can manually adjust it by trimming the clip on the composition timeline;
- Once you’re content with the speed and duration settings, you can export the completed video. Navigate to the Composition menu, select Add to Render Queue, adjust the output settings, and click the Render button to export the accelerated video.
The “Speed/Duration” option provides a swift and straightforward way to enhance the playback speed of clips in After Effects. Notably, this approach applies speed control uniformly across the clip’s duration. For more intricate speed variations or precise speed control, you may need other techniques, such as time modification or time stretching.
Method 2: Leveraging Time Remapping
Time Remapping, a potent technique in After Effects, offers precise speed control over your clips. Utilizing keyframes, you can craft smooth transitions and dynamic speed alterations. Here’s a guide to using time remapping in After Effects:
- Begin by importing your preferred clip into your After Effects project, accessed through the “File” option on the menu;
- Next, generate a composition by right-clicking the clip in the project pane, then select “New Composition from Selection.” This creates a composition matching the clip’s parameters;
- Next, enable time remapping by selecting the video layer in the compositions panel and right-clicking it. In the context menu, navigate to “Time” and choose “Enable Time Remapping”. This sets keyframes at the start and end of the clip, indicating the original duration and playback speed;
- Keyframes can be added along the timeline to change the clip’s speed. Move the current time indicator (CTI) to the point where the speed change should start, then create the first keyframe by pressing Option (Mac) or Alt (Windows) and clicking the stopwatch icon next to the Time Remap property on the timeline;
- Adjust the speed by moving the CTI to the point where the speed change should end. Then, change the value of the second keyframe to the desired time in the “Time Remap” property. To amplify the clip’s speed, you can lessen the time value between the two keyframes;
- You can create a tempo effect with a gradual speed change by adding additional keyframes between the start and end keyframes. To do this, move the CTI to the desired positions and repeat the process of creating keyframes and adjusting their timing values;
- View the outcome by playing back the composition to observe the speed changes. You can use the playback controls or drag the CTI across the timeline;
- For fine-tuning, individual keyframes on the timeline can be selected and moved. Dragging a keyframe horizontally changes the time value, while dragging vertically alters the speed;
- Once content with the speed variations, export the completed video. Navigate to the Composition menu, select Add to Render Queue, adjust the output settings, and click the Render button to export the video.
Timeline remapping enables dynamic speed changes and complex storytelling effects in your clip. By adding keyframes and adjusting their positions and values, you can control the acceleration and deceleration of a clip, crafting exciting visual effects.
Method 3: Implementing Time Stretching
Time Stretching, a technique in After Effects, lets you alter the duration of your clip while maintaining the original pitch. This method is handy when you aim to amplify your clip’s speed without changing the audio.
Here’s how to implement time stretching in After Effects:
- Import your desired clip into your After Effects project by selecting “File” from the menu;
- Next, create a composition by right-clicking the clip in the project pane and selecting “New Composition from Selection.” This action forms a new composition matching the clip’s parameters;
- Access Time Stretch by selecting the video layer in the compositions panel and right-clicking it. From the context menu, navigate to Time and choose Time Stretch;
- In the “Time Stretch” dialog box, locate the “Stretch Factor” option and increase its value to amplify the clip’s speed. For instance, a stretch factor set to 200% will result in double the speed;
- If you want the audio to remain unaffected by time stretching, check the Preserve Pitch checkbox. This option is especially useful to avoid sound distortion when accelerating a clip;
- After applying time stretching, click the “OK” button. You can now preview the clip in the composition panel or use the playback controls to view the enhanced playback while preserving the original audio pitch;
- Post time stretching, you may notice a change in the clip’s duration. If a specific duration is required, it can be manually adjusted by trimming the clip on the composition timeline;
- Exporting your completed clip: Once you’re content with the duration and speed settings, you’re ready to export your final product. Navigate to the Composition menu, select ‘Add to Render Queue’, tweak the output settings as necessary, and hit the ‘Render’ button to generate your accelerated clip.
Time stretching is an efficient technique to alter the length of a clip, effectively accelerating it while maintaining the original audio pitch. This is particularly useful when you aim to synchronize with the original sound or avoid pitch distortion. Using time stretching in After Effects, you can successfully adjust the pace of your clips to achieve your desired visual effects.
How to Alter Speed in After Effects?
To manipulate the speed in After Effects, the time-stretching feature comes in handy. This feature lets you manage the playback pace, allowing for smooth transitions between different speeds.
Leveraging the time variation functionality in After Effects, you can conveniently control the pace alteration of your clip and create dynamic visual effects. Try varying keyframe placements and timing values to attain the speed alterations you desire, thereby enhancing your clip’s narrative.
How Can I Accelerate a Clip?
To modify a clip and accelerate it, consider using video editing software such as Adobe Premiere Pro, Final Cut Pro, or iMovie. Here’s a basic step-by-step guide:
Note that the exact steps may differ based on the software you’re employing. It’s crucial to familiarize yourself with the features and abilities of your chosen editing software to effectively edit and accelerate your clip.
What’s the Term for Accelerating or Decelerating a Layer in After Effects?
The procedure of accelerating or decelerating a layer in After Effects is commonly known as time remapping. Time remapping enables you to control a layer’s playback speed by adjusting the timing and duration of its keyframes. By modifying keyframe timing, you control the playback speed of a layer, producing acceleration or deceleration effects. This technique is frequently utilized to create slow-motion effects and introduce dynamic visual elements to clips.
Final Thoughts
Adobe After Effects is a versatile platform that empowers video editors to unlock their creative potential and invigorate their footage. Understanding the various speed control techniques in After Effects can bolster your editing skills and help you produce thrilling visual effects.
Whether you prefer the simplicity of the ‘Speed/Duration’ option or the precision of time remapping and stretching, AE provides several methods to cater to your specific requirements. So, dive in, experiment with speed alterations, and unlock the potential of your clips with After Effects. Gear up to mesmerize your audience like never before!
