Freeze Frame: Tips to Master the Technique in After Effects
Adobe After Effects (AE) is a renowned video editing tool widely used for commercial and professional purposes. Its feature-rich capabilities make it a preferred choice among editors. However, for beginners, the software may initially appear complex. One essential feature in AE is the ability to create freeze-frames, which allows you to hold a video on a single frame for an extended duration.
When it comes to clip editing, Adobe After Effects stands out from other tools due to its comprehensive range of editing tools and unique features. With AE, you have access to a layer-based editing system that provides a professional approach to video editing. This means you can seamlessly add transitions, multiple layers, effects, audio, and more, all in a single instance.
Whether you’re a seasoned professional or a beginner navigating the intricacies of video editing, Adobe After Effects offers a robust platform to bring your creative vision to life. With its array of tools and capabilities, AE empowers you to craft visually stunning and engaging videos for various purposes.
Creating Captivating Freeze Frames: Easy-to-Follow Steps
Freeze frames are a powerful technique in video editing that can add dramatic impact and captivate viewers. Whether you want to freeze a specific moment in time, emphasize an important scene, or create a stylized visual effect, mastering the art of freeze frames can greatly enhance your video projects. Here are steps to create captivating freeze frames:
Step 1: Download and Install After Effects
To get started with After Effects, you’ll need to download the software from the official Adobe website. Follow the installation instructions carefully to ensure that the software is installed correctly on your computer. Once the installation process is complete, you should see the After Effects application icon on your desktop.
After Effects is compatible with both macOS and Windows operating systems, so you can use it on whichever platform you prefer. To open the software, simply double-click on the After Effects icon on your desktop. This will launch the application and take you to the main interface, where you can start creating your projects.
Step 2: Create a New Composition
Once you have launched After Effects and opened a new project, you’ll be presented with a range of options to help you get started on your video editing journey. One of the first things you’ll need to do is import the video footage that you want to edit into the software.
There are a few different ways to do this, but one of the most common methods is to drag and drop your video directly into the After Effects workspace. Simply locate the video file on your computer, click and hold on it, and then drag it over to the After Effects window. This will automatically import the video into your project and add it to the timeline.
Alternatively, you can also import your video footage by clicking on “File” in the top menu bar, selecting “Import”, and then choosing the video file you want to use. This will give you more control over the import settings, such as the frame rate and resolution of the video.
Another option is to click on “New Composition from Footage” in the “File” menu, which will create a new composition based on the video file you have selected. This can be a useful option if you want to create a new composition that matches the settings of your video footage, such as the frame rate and resolution.
Step 3: Import Video and Arrange on the Timeline
To start editing your video, simply drag it from the project panel and drop it onto the timeline area. Once your video is on the timeline, you can start making edits by selecting specific frames and making adjustments using the various tools available in After Effects.
One of the most useful features of the timeline is the ability to zoom in and out to get a better view of your video. You can do this by using the zoom slider located at the bottom right of the timeline or by using the zoom tool located in the toolbar.
In addition to editing your video footage, you can also add other elements to your timeline, such as audio tracks, text, and graphics. These elements can be added to separate layers in the timeline, allowing you to make adjustments to each element individually.
Step 4: Select the Frame to Freeze
Above the video timeline in After Effects, you will find a slider or playhead that allows you to navigate to specific frames in your video. This slider is a critical tool for editing and is used to locate the precise moment in your video that you want to freeze.
To use the slider, simply click and drag it to the left or right to move through your video frame by frame. Alternatively, you can click on the slider and use the left and right arrow keys on your keyboard to move through the frames.
Once you have located the frame that you want to freeze, you can use the “Space bar” on your keyboard to play and pause the video. This will help you to confirm that you have selected the correct frame and that it is the right moment to freeze.
If you need to make any adjustments to the timing of your freeze frame, you can use the slider to move back and forth through the frames until you find the perfect moment. This level of precision is what makes After Effects such a powerful tool for video editing and motion graphics design.
Step 5: Create a New Layer

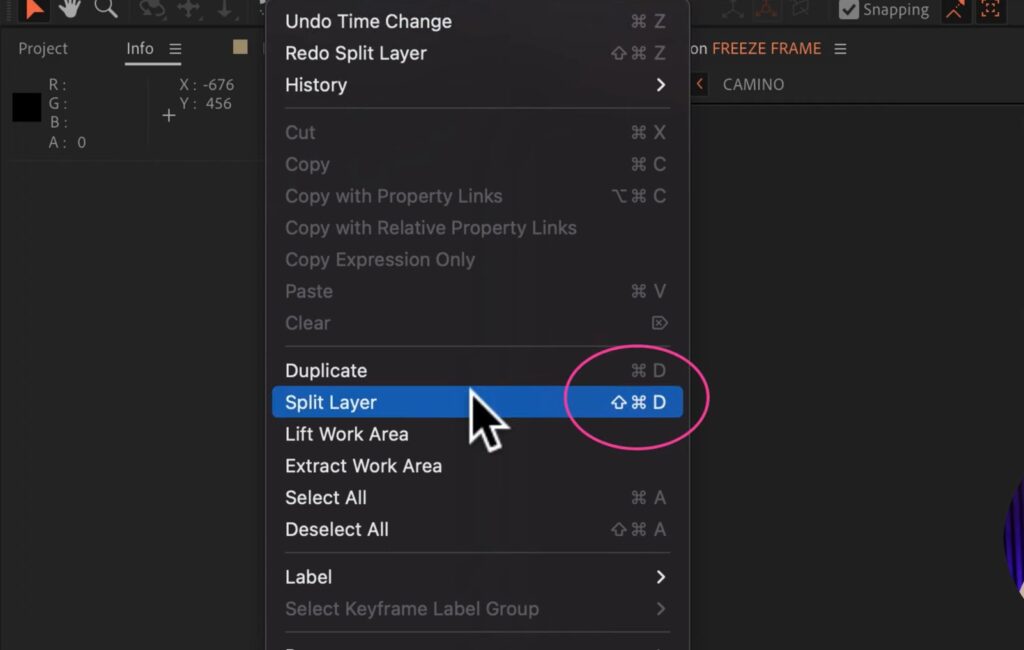
Splitting a video at a specific frame is a common task in video editing, and After Effects makes it easy to achieve this with just a few clicks. Once you have paused the video at the desired frame, you can split the video using the keyboard shortcut “Ctrl + Shift + D” (or “Command + Shift + D” on macOS).
When you split a video in After Effects, it creates a new layer containing the video segment right after the selected frame. This new layer can be edited independently of the original layer, allowing you to make specific adjustments to each segment of the video.
One of the most useful aspects of this feature is that it allows you to create seamless transitions between different segments of your video. For example, you can split a clip at a specific frame and then add a transition effect between the two segments, such as a fade or a dissolve. This can help to create a smooth and professional-looking video that is sure to impress your audience.
Another advantage of splitting a video in After Effects is that it allows you to work with specific segments of the video without affecting the rest of the footage. This can be particularly useful when you need to make adjustments to a specific section of your video, such as adjusting the color or brightness of a particular frame.
Step 6: Freeze the Frame
When working with video footage in After Effects, there may be times when you want to freeze a specific frame to create a static image. This is a common technique used in video editing to emphasize a particular moment or to create a visual effect. After Effects makes this process easy by providing a “Freeze Frame” option that allows you to freeze a specific frame of your video.
To freeze a frame in After Effects, you first need to split the video at the desired frame using the “Ctrl + Shift + D” (or “Command + Shift + D” on macOS) keyboard shortcut. This will create a new layer containing the video segment right after the selected frame.
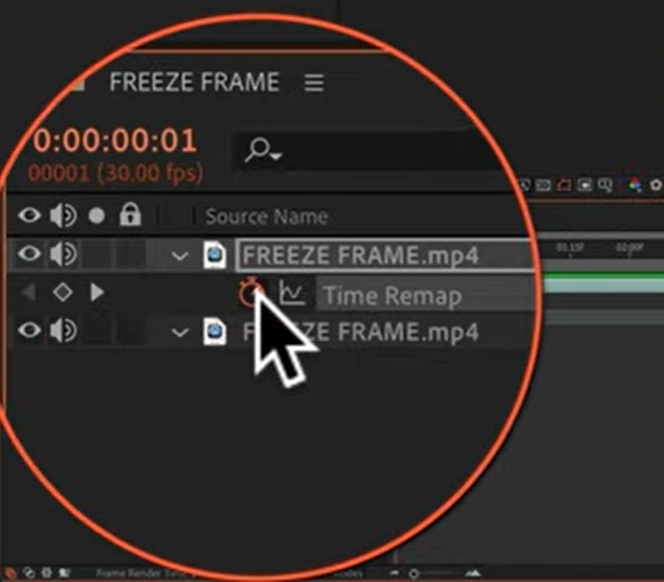
Once you have created the new layer, right-click on it, and a settings menu will appear. From here, navigate to “Time” and select “Freeze Frame”. This action will freeze the frame you selected, creating a static image for the duration of the freeze.

Freezing a frame in After Effects can be useful in a variety of situations. For example, you may want to freeze a frame to create a title card or to add text or graphics to a specific moment in your video. You can also use this technique to create slow-motion or time-lapse effects by freezing a frame and then adjusting the timing of the rest of the video.
Step 7: Export and Save the Edited Video
After you have finished editing your video in After Effects and created a freeze frame, it’s time to save your final product. Saving your video is an important step in the editing process, as it allows you to share your work with others or use it in other projects.
To save your edited video in After Effects, go to the File menu and select “Export”. This will open the Export Settings dialog box, where you can choose the desired export settings and file format according to your requirements. There are many different options available in the Export Settings dialog box, including video codec, resolution, frame rate, and audio settings.
Once you have selected your desired export settings, choose a location on your computer to save the video. It’s a good idea to create a new folder specifically for your edited video to keep things organized.
After you have saved your video, you can share it with others or use it in other projects as needed. It’s important to note that the export process can take some time, especially for longer videos or high-quality settings. Be patient and allow the export process to complete before closing After Effects or shutting down your computer.
Conclusion
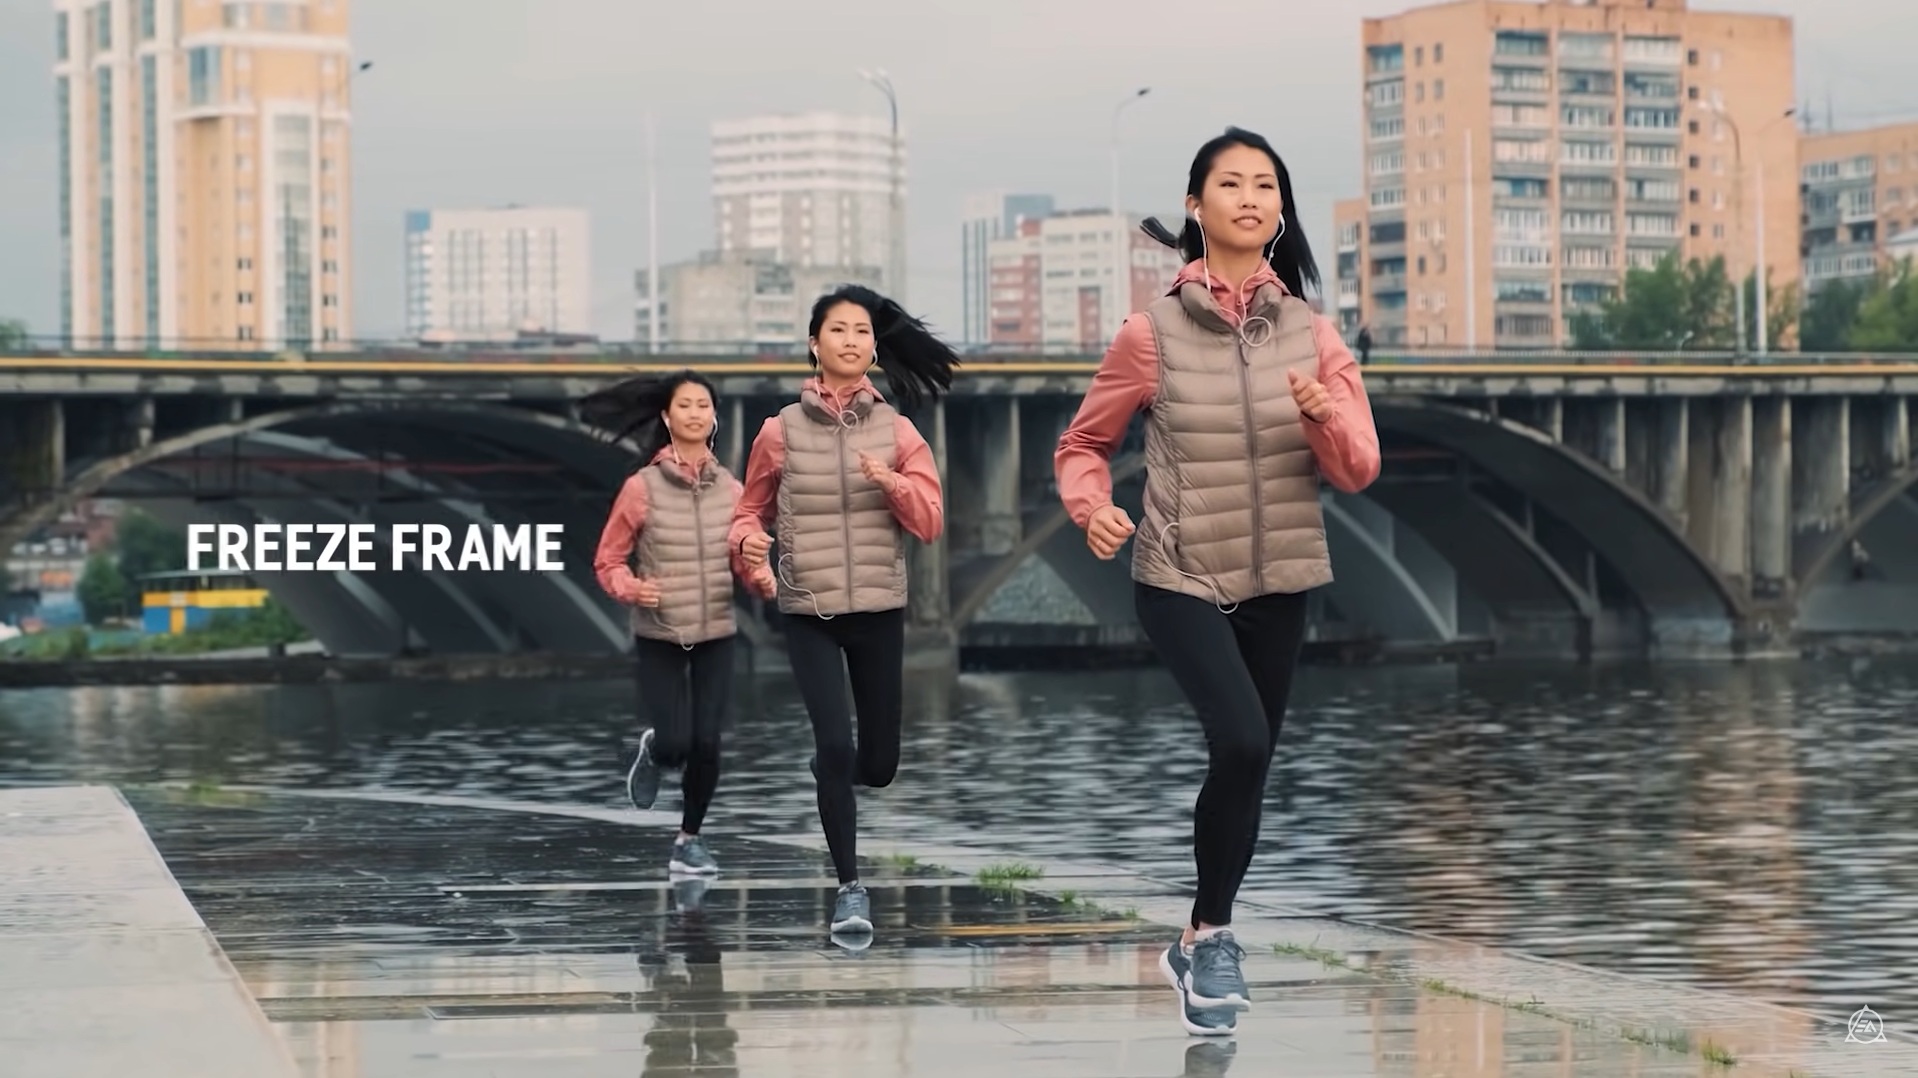
The After Effects Freeze Frame feature is a powerful tool that can be used to create stunning visual effects in video editing. With just a few clicks, you can split your video at a specific frame and create a static image for the duration of the freeze.
Freezing frames can be useful in a variety of situations, from emphasizing specific moments to creating slow-motion or time-lapse effects. After Effects makes this process easy by providing a “Freeze Frame” option that allows you to freeze a specific frame of your video.
In addition to freezing frames, After Effects offers a wide range of features and tools for video editing and motion graphics design. Whether you’re a beginner or an experienced professional, there’s always something new to learn and explore in After Effects.
