How to Modify Fade In/Out Layers in After Effects
Unlock the secrets to swiftly modifying layer transparency and achieving seamless fade-in and fade-out effects in After Effects. This article provides step-by-step instructions on how to effortlessly change the opacity of a layer, allowing you to create smooth transitions in just a matter of seconds. Enhance your projects with stunning visual effects using this simple yet powerful technique.
Effortlessly Adjust Layer Transparency
Master the art of swiftly adjusting layer transparency in After Effects with this easy-to-follow tutorial. Simply select the desired layer in your composition and press the “T” key to reveal the Opacity property. This shortcut, reminiscent of Big Bird holding up the letter T, will forever be etched in your memory as your go-to tool for seamless transparency control. Say goodbye to complicated processes and embrace the simplicity of changing layer opacity in a matter of seconds.
Adjusting Layer Transparency in After Effects is as simple as modifying the value next to “100%.” Lowering the value to 0% renders the layer fully transparent, while 50% achieves a semi-transparent effect. You can easily modify the value by clicking and dragging left or right, or by directly typing in a value and pressing the Return/Enter key to apply the change.
Master the Art of Fading In and Out Layers
Creating a smooth fade in or fade out transition in After Effects is a breeze with the Opacity property. Here’s how to do it:
Fade In:
- Position the time indicator at the desired completion point of the transition (e.g., 10 frames, 1 second);
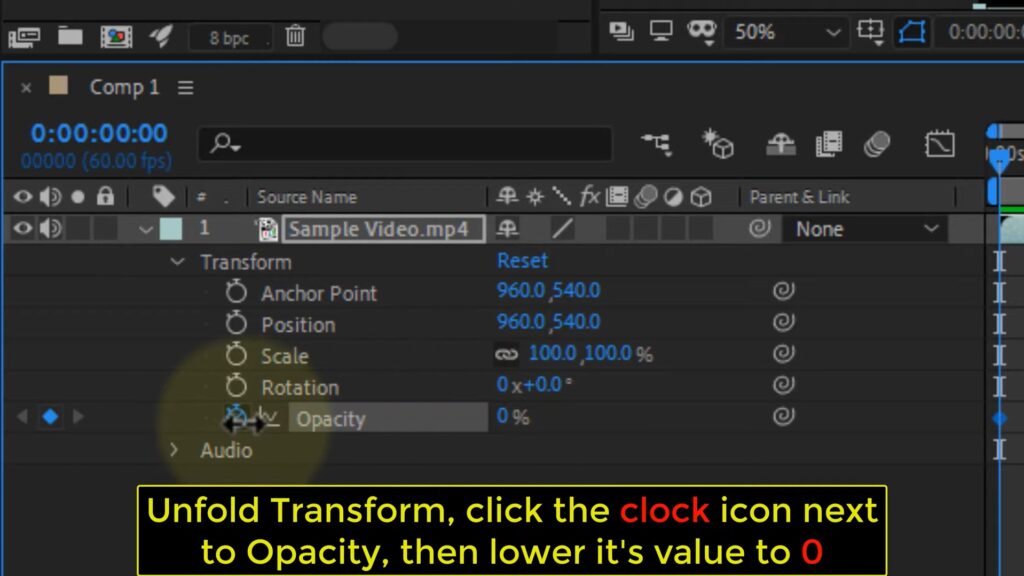
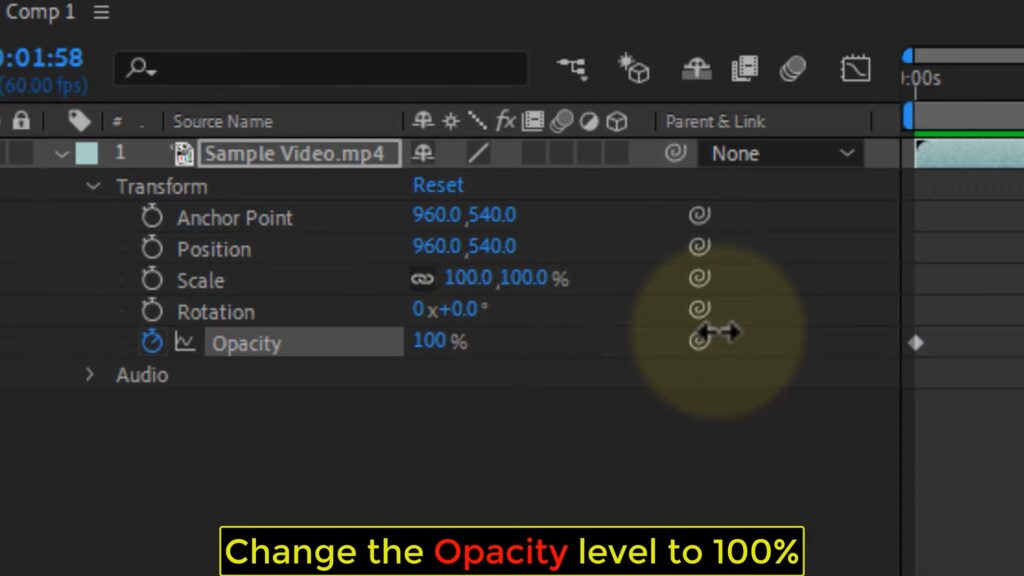
- In the Opacity property, click the stopwatch icon next to Opacity to set a keyframe. Ensure the value is set to 100%;
- Move the time indicator to the beginning of the Composition or the desired starting point for the transition;
- Set the value to 0%. This action automatically creates a new keyframe.


To create a fade-out transition, follow these steps:
- Determine the desired starting time of the transition and move the time position indicator to that point;
- If no keyframes have been created for the Opacity property on the layer, click the stopwatch icon next to Opacity.
If keyframes already exist, it is likely because you previously created a fade-in transition. In this case, click the “add keyframe” button for the Opacity property. This button is represented by a small diamond icon located on the left side of the Opacity property line;
- Ensure that the value is set to 100% for this initial keyframe;
- Now, move the time position indicator to the desired completion time of the fade-out and change the Opacity property value to 0%.

Conclusion
Mastering the art of After Effects fade-ins and fade-outs can greatly enhance the visual impact of your videos. With these techniques, you can seamlessly transition between scenes, captivate your audience, and elevate your video editing skills to new heights.
Whether you’re a seasoned video editor or just starting your journey, learning how to effectively utilize After Effects fade-ins and fade-outs is a valuable skill. By employing these techniques, you can transform your videos into cinematic experiences that leave a lasting impression.
