Level Up Your After Effects Skills
When it comes to motion graphic projects, working with After Effects masks is inevitable. Whether you’re a seasoned professional or a newcomer to the field, there’s always something new to learn about using masks in After Effects. In this tutorial, I’ll guide you through both the fundamental and advanced techniques of working with After Effects masks, ensuring that by the end of this article, you’ll not only have a firm grasp on how to utilize shapes and layers, but also feel more confident and at ease when working with them. With a decade of experience in the motion graphic industry, I’ve gathered valuable insights and tricks that I’m excited to share with you.
Understanding After Effects Masks
In the realm of After Effects, a mask serves as a versatile tool that can conceal or reveal specific areas within a layer or multiple layers within your composition. Essentially, a mask is a controllable path or outline composed of vertices that offer flexibility for adjustment and animation. By comprehending the fundamental concept and functionality of After Effects masks, you unlock a powerful feature that empowers you to shape and manipulate your visuals with precision and finesse.
Exploring the Different Types of Masks in After Effects
When working with masks in After Effects, you’ll encounter two main types that offer distinct capabilities:
- Regular Masks: They are created directly on a layer and are constructed using the Pen Tool or other shape tools. Regular masks allow you to define specific areas of the layer to either hide or reveal, providing precise control over visibility;
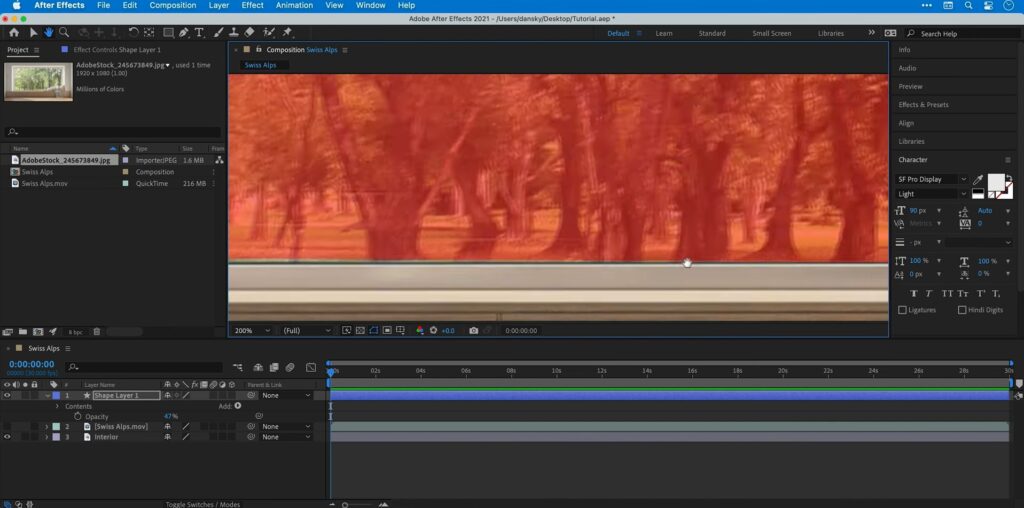
- Shape Layer Masks: After Effects offers the convenience of shape layer masks. These masks are created on separate shape layers and can be easily manipulated, resized, and animated. Shape layer masks provide a flexible and efficient way to incorporate complex shapes and designs into your compositions.
Here are some important pointers to keep in mind when working with masks in After Effects:
- Selecting a Layer: When you create a mask, be mindful of whether or not you have a layer selected on the timeline. If a layer is selected, a standard mask will be created. Conversely, if no layer is selected, a shape layer mask will be generated;
- Understanding Regular Masks: Regular masks are commonly used for tasks such as rotoscoping and morphing, as they allow you to efficiently mask multiple frames. With regular masks, you have the flexibility to define specific areas of a layer for hiding or revealing.

Creating a Mask in After Effects
To create a mask in After Effects, follow these simple steps:
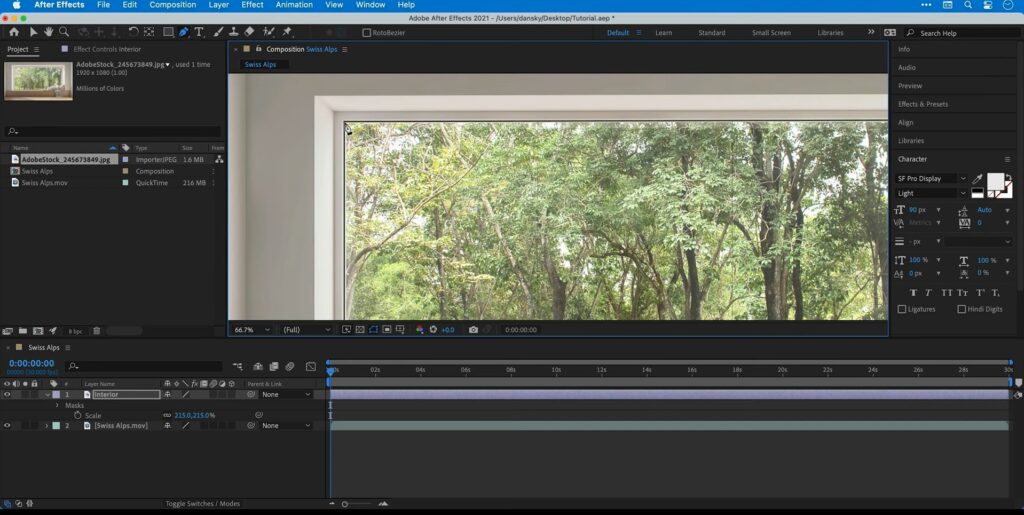
- Select Your Image/Video: On your timeline, click to select the image or video layer to which you want to apply the mask;
- Access the Shape Tool: Locate the shape tool icon in the top tools bar of After Effects. You can also use the shortcut key “Q” to access it quickly;
- Draw the Mask: In your composition window, click and drag with the shape tool to draw a rectangle mask directly onto your image or video. Adjust the size and position of the mask as needed.
To conveniently toggle the visibility of your mask outline and shape path in After Effects, follow these steps:
- Locate the Toggle Mask and Shape Path Visibility Icon: At the bottom of your composition window, you will find the Toggle Mask and Shape Path Visibility icon. It resembles a small square with a circle inside;
- Click the Icon to Toggle Visibility: By clicking this icon, you can easily switch the visibility of your mask outline and shape path on and off. This feature is especially useful when you want to preview your composition without distractions or when you need to make precise adjustments to your mask.
Modifying Masks in After Effects
When working with masks in After Effects, there are several methods to modify them. Below, I’ll cover the fundamental techniques:
Moving Individual Mask Points:
- Select the layer on your timeline;
- Press the V key to access the Selection tool;
- Start moving each mask point individually to adjust the mask shape as desired.
Moving Multiple Mask Points Simultaneously:
- Select the layer on your timeline;
- Press the M key to access the mask properties;
- Select the Mask Path;
- Press the V key to activate the Selection tool;
- Click on one mask point/vertex;
- You should be able to move all the points together, making bulk adjustments more efficient.
Resizing or Rotating a Mask:
- Select the layer on your timeline;
- Press the M key to access the mask properties;
- Select the Mask Path;
- Double-click on any mask point/vertex;
- Position your cursor on the corner of the layer, where you should see the resize cursor, allowing you to scale the mask;
- Press the Shift key to maintain proportional scaling while resizing.
Note: By moving your cursor further on the corner, you will also see the rotate cursor, enabling you to rotate the mask as needed.
Mask Modes in After Effects
After Effects offers seven mask mode options that provide different ways to combine or interact with masks. To access these modes, follow the steps below:
- Locate the layer with the mask on your timeline;
- Click on the drop-down menu located next to the mask properties;
- A list of options will appear, including the following:
- None: This mode applies no mask interaction;
- Add: It adds the masked area of the selected layer to the underlying layers;
- Subtract: It subtracts the masked area of the selected layer from the underlying layers;
- Intersect: It keeps only the overlapping area of the selected layer and the underlying layers;
- Lighten: It compares the masked area of the selected layer with the underlying layers and displays the lighter pixels;
- Darken: It compares the masked area of the selected layer with the underlying layers and displays the darker pixels;
- Difference: It creates an inverted representation of the masked area by comparing the selected layer with the underlying layers.

Creating a Shape Layer Mask in After Effects
To create a shape layer mask in After Effects, follow these simple steps:
- Ensure that no layer is selected on your timeline;
- In the top tools bar, click on the shape tool icon (also accessible by pressing the “Q” key shortcut);
- Choose the desired shape, such as a rectangle, from the shape options;
- Click and drag on your composition to draw the shape;
- Position the shape layer above the image or video layer you want to apply the mask to;
- Select the image or video layer;
- Go to the “Track Matte” options and change the setting to “Alpha”;
After creating a shape layer mask in After Effects, you can easily modify the fill color and stroke color with a simple shortcut:
- Ensure that your shape layer mask is selected on the timeline;
- Hold down the ALT key on your keyboard;
- Click on either the fill color or the stroke color in the layer properties.
Using the Shape Tools in After Effects
The Shape tools in After Effects, accessible through the after effects shape tool icon (Shortcut: Press Q), provide a range of options for creating masks or shape layers with different paths. Here are the available Shape tools and their respective path options:
- Mask Shape Tool – Rectangle (default shape):
This tool creates rectangular masks or shape layers.
- Rounded Rectangle Tool:
This tool creates rounded rectangular masks or shape layers with customizable corner radius.
- Ellipse Tool:
This tool creates elliptical masks or shape layers.
- Polygon Tool:
This tool creates polygonal masks or shape layers with adjustable sides and rotation.
- Star Tool:
This tool creates star-shaped masks or shape layers with customizable inner and outer radius, points, and rotation.
Pen Tool to Trace Masks in After Effects
In After Effects, the Pen Tool (shortcut: Press G) is your go-to tool for creating custom mask shapes by tracing paths with vertex points. When using the Pen Tool, you also have access to various editing options to refine your path. Here are the available Pen Tool options:
- Pen Tool:
This tool allows you to create and adjust vertex points on your mask shape path.
- Add Vertex Tool:
With this tool, you can add additional vertex points to an existing mask shape.
- Delete Vertex Tool:
Use this tool to remove unwanted vertex points from a mask shape.
- Convert Vertex Tool:
This tool enables you to convert straight lines into curves by adjusting the direction handles of selected vertex points.
- Mask Feather Tool:
The Mask Feather Tool allows you to modify the feathering or softness of the mask edges.
Tips for Working with the Pen Tool in After Effects:
- RotoBezier:
If you want to create smooth and curved paths automatically, enable the RotoBezier option. This feature will generate smooth curves between your points, giving you a more fluid and organic shape.
- Uncheck Rotobezier:
If you prefer more control over your path and want to adjust the Bezier handles of your points manually, uncheck the Rotobezier option. This allows you to have precise control over the placement and direction of the Bezier handles, giving you greater flexibility in shaping your mask.
How to Edit and Modify a Shape Layer Mask in After Effects
- Converting Default Shape Layer Mask to Bezier Path:
By default, when you create shape layer masks such as rectangles, ellipses, or polygons, you may find that you can’t move the individual points or vertices. To gain more control and modify the points, right-click on the mask’s path and select “Convert to Bezier Path.” This conversion allows you to manipulate and adjust each point individually.
- Handy Edit Tools for Shape Layer Masks:
After converting the shape layer mask to a Bezier path, you have access to various edit tools to further modify and animate your mask. These tools can be found under the “Add” menu (refer to the screenshot below). It is recommended to explore each tool and become familiar with their functionalities. Experimenting with these tools will help you understand their specific uses and how they can enhance your shape layer masks.
Additionally, you can visit the Adobe website for detailed information on each of the tools available in the Add menu.
How to Create a Custom Mask in After Effects
Creating a custom shape in After Effects directly may not be the most efficient approach and can potentially slow down your workflow. Instead, we can utilize Adobe Illustrator to create the vector shape and then incorporate it into After Effects. Follow the steps below:
- Open Adobe Illustrator and design your desired vector shape.
- Create and refine the shape using the various tools available in Illustrator;
- Ensure that your shape is saved in a compatible file format (e.g., .ai or .eps).
- Save your Illustrator file and open After Effects.
- Import the saved Illustrator file into your After Effects project;
- Place the file in your composition accordingly.
- Import an image or video that you want to apply the custom shape mask to.
- Drag and position the image or video layer below the custom shape layer in the timeline.
- Apply the custom shape mask to the image or video layer.
- Click on the Track Matte drop-down menu for the image or video layer;
- Choose the option “Alpha Matte” from the drop-down menu.
- You should now see your custom shape mask revealing the underlying image or video.
- The custom shape acts as a mask, defining the area that will be visible.
Conclusion
By understanding the various techniques and options available, you can effectively isolate and manipulate specific areas of your compositions. Whether you’re creating visual effects, motion graphics, or animations, the ability to control and modify layer masks is an essential skill. With practice and experimentation, you can achieve seamless blending, precise adjustments, and captivating visual effects.
